Have you ever spent hours perfecting a recipe, plating it like a Michelin-starred chef, only to pull out your smartphone and capture an image that looks flat, unappetizing, and completely devoid of life, leaving you wondering how to take better food photos? If you are a social media enthusiast looking to boost your Instagram engagement, you are likely searching for how to take better food photos, or if you are a new food blogger trying to build a loyal audience, mastering how to take better food photos is essential. Understanding how to take better food photos is one of the most highly sought-after skills in today's digital landscape, and even restaurant owners struggling to create mouth-watering delivery menus on a shoestring budget need to know how to take better food photos to succeed.
For decades, the culinary photography industry was gatekept by professionals with $3,000 DSLR cameras, massive lighting softboxes, and expensive food stylists. But in 2026, the game has fundamentally changed. In this comprehensive guide, we will walk you through the essential principles of lighting, composition, and styling. More importantly, we will reveal the ultimate modern secret: bypassing expensive equipment entirely by using AI food photography to upgrade your visual content instantly. Grab your smartphone, and let's dive in.
1. The Foundation: Mastering Light and Shadows
Photography literally translates to "drawing with light." If you do not have good lighting, no amount of editing or expensive camera gear can save your image. The most critical mistake beginners make is relying on the wrong light sources.
Ditch the Overhead Lights and Flash
Never shoot your food under standard, overhead kitchen lights. These tungsten or fluorescent bulbs cast harsh, unflattering shadows and give your food a sickly yellow or green tint, which is a major obstacle when learning how to take better food photos. It makes fresh salads look wilted, bread look stale, and meats look unappealing. If you want to master how to take better food photos, you must also avoid the built-in flash on your smartphone, as it flattens the texture of the food and creates greasy-looking hot spots on plates and sauces. Using a professional setup or AI tools is much more effective than relying on a flash if you are serious about how to take better food photos.
Embrace the Magic of Diffused Window Light
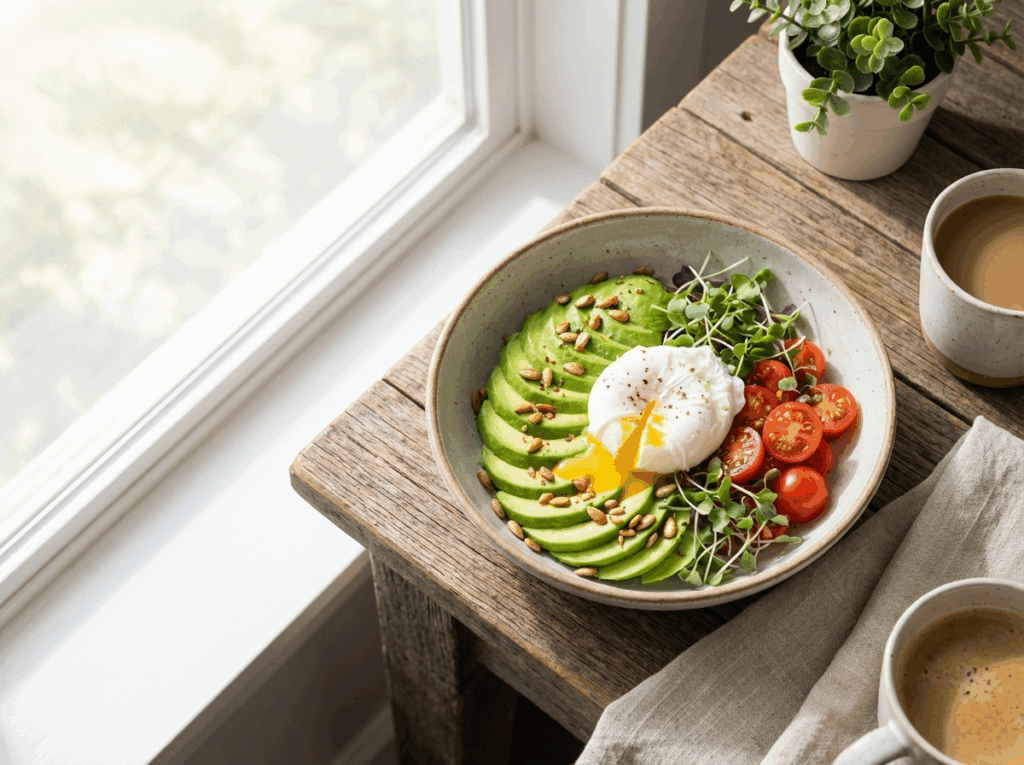
The absolute best light source is free: natural daylight. Set up your shooting table next to a large window. Position your food so the light hits it from the side (side-lighting) or slightly from behind (back-lighting). Side-lighting emphasizes the beautiful textures of a crusty loaf of bread, while back-lighting is incredible for making soups and beverages glow.
But what if your kitchen has no windows, or you prep meals at night? You do not need to buy a $500 studio light. You can simply snap the photo under whatever light you have, and use smart tools to generate studio-quality images that automatically fix the lighting, balance the color temperature, and eliminate harsh shadows for you.
2. Nail the Composition and Angles
Composition is how you arrange the elements within your frame. A messy composition confuses the viewer's eye, while a strong composition guides them exactly to where you want them to look.
The Rule of Thirds and Negative Space
Before you take another photo, turn on the Grid feature on your smartphone camera settings. The rule of thirds dictates that you should place your main subject (like the highest peak of a burger or the focal point of a salad) along these intersecting lines, rather than dead center. Leaving some negative space (empty areas) around your dish allows the food to breathe and draws the viewer's attention directly to the meal.
Choosing the Perfect Angle for the Dish
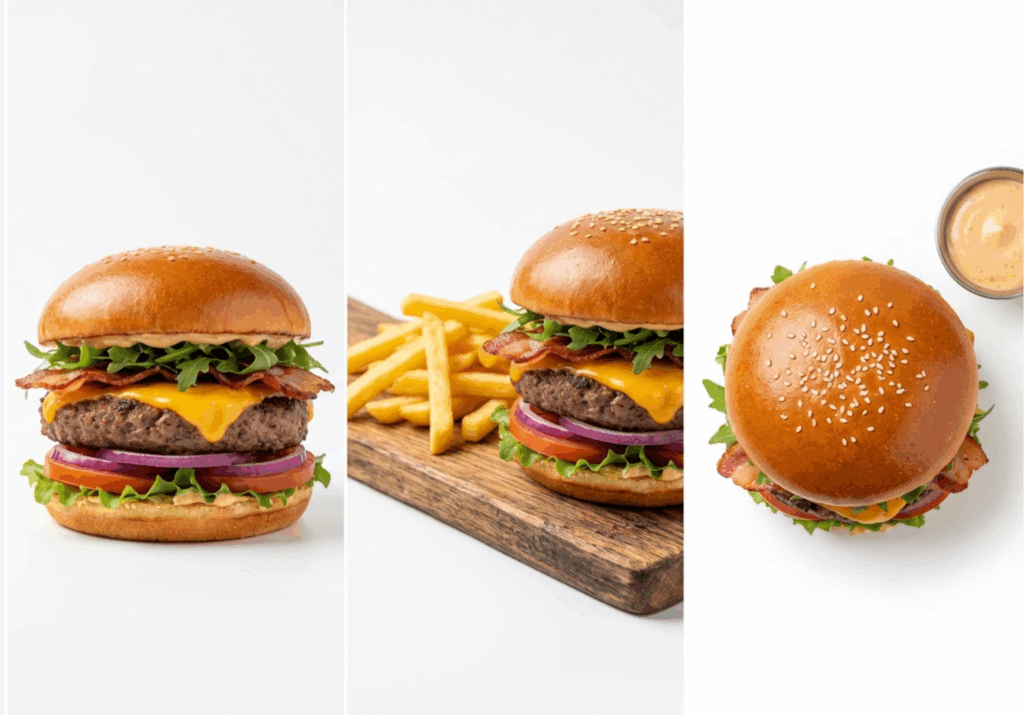
To truly understand how to take better food photos, you must realize that your camera angle should highlight the most important features of the food. Every dish has a best side, and finding it is crucial.
- 0 Degree Eye-Level (Straight On): Shot from table level. Perfect for emphasizing height and vertical details, like towering burgers, stacks of pancakes, or layered cocktails.
- 45 Degree Three-Quarter View: The universal standard. It mimics a diner sitting at a table looking down at their plate. Ideal for pasta bowls, plated dinners, and steaks.
- 90 Degree Top-Down (Flat Lay): Shot directly from above. Fantastic for emphasizing shapes and the overall scene, such as a full table spread, a beautifully decorated pizza, or latte art.
3. Color Theory and Food Styling
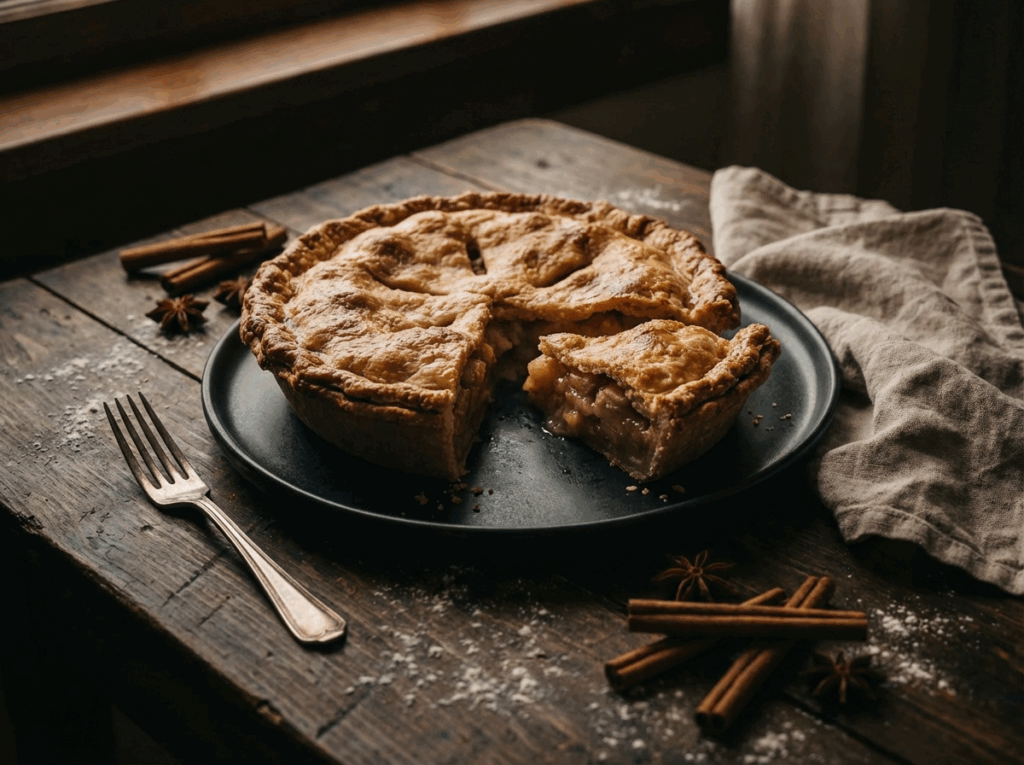
A plate of food sitting alone on a bare table rarely tells a compelling story. Food styling is about creating an atmosphere that makes the viewer wish they were sitting right there.
Utilize Complementary Colors
Colors that sit opposite each other on the color wheel create visual tension. If you are shooting a vibrant orange pumpkin soup, place a dark blue napkin underneath the bowl. The contrast will make the orange color look incredibly rich.
Storytelling with Props
Props should make sense for the dish. Incorporate the raw ingredients used in the recipe. You can scatter a few whole coffee beans next to a cappuccino, or place a fresh lemon half next to a seafood dish.
However, buying high-quality matte plates, rustic wooden backdrops, and marble slabs can quickly drain your budget. Creating these setups takes hours of planning and cleaning. What if you do not have the time or the money for this?
4. The Ultimate 2026 Hack: A 3-Step Guide to AI Photography
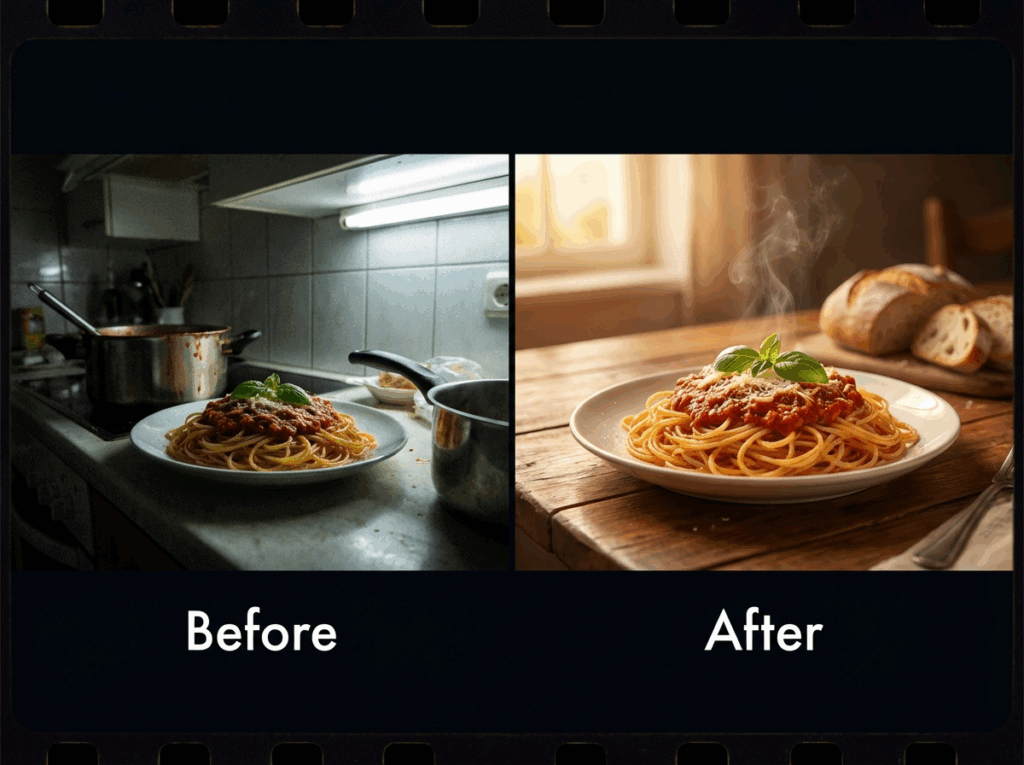
Let us face the reality of the modern digital landscape. Even if you memorize every composition rule and color theory, you might simply lack the budget for an aesthetic kitchen and high-end props.
The modern secret to learning how to take better food photos without a studio is utilizing artificial intelligence. If you are struggling with a messy background, bad lighting, or uninspiring presentation, a dedicated AI food photo generator is your ultimate hack. It allows you to transform a basic smartphone snapshot into a breathtaking, commercial-grade masterpiece.
You do not need any technical editing skills. The entire magic happens in three incredibly simple steps:
Step 1: Upload Your Everyday Food Photo
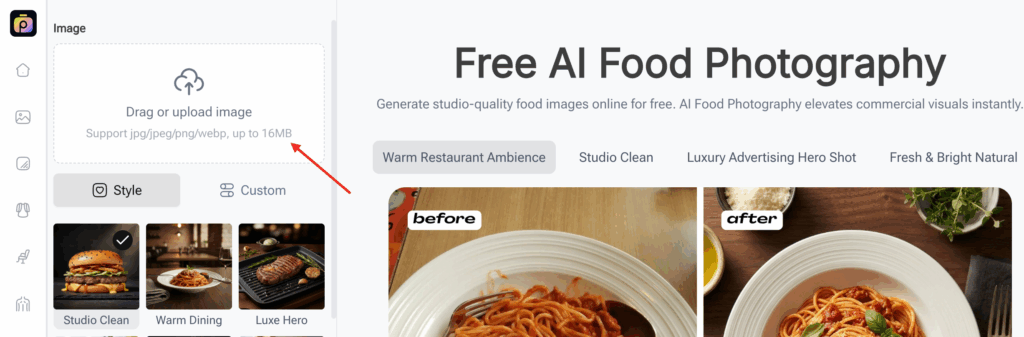
Forget about cleaning your kitchen or setting up lights. Simply drag and drop or upload your raw food image into the platform. It does not matter if the background is your cluttered desk or the lighting is a dim kitchen bulb. As long as the food is visible on the plate, the AI will perfectly map its textures, shapes, and ingredients.
Step 2: Choose Your Style, Angle, and Aspect Ratio
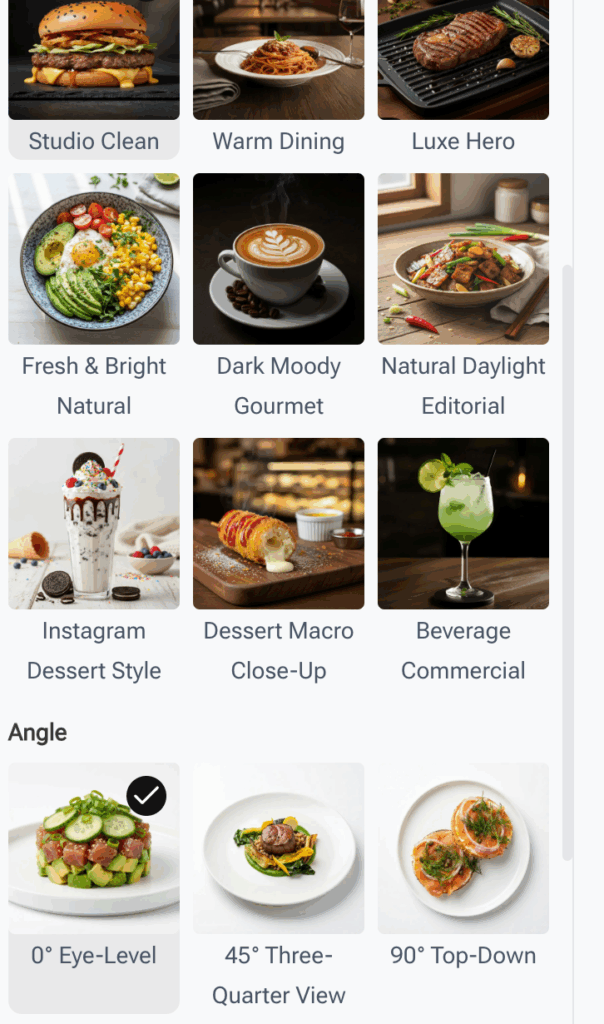
This is where you become the art director. Tailor the environment instantly to match your brand:
- Select the Vibe: Choose from a vast library of professional styles. Use "Studio Clean" for a crisp, white background perfect for UberEats menus. Select "Warm Restaurant Ambience" to add a cozy, high-end dining room blur, or "Dark Moody Gourmet" for dramatic Instagram aesthetics. There are even dedicated styles for "Desserts" and "Beverages".
- Fix the Angle: Did you shoot it from the wrong perspective? Tell the AI to render the scene at a perfect 0 degree, 45 degree, or 90 degree angle.
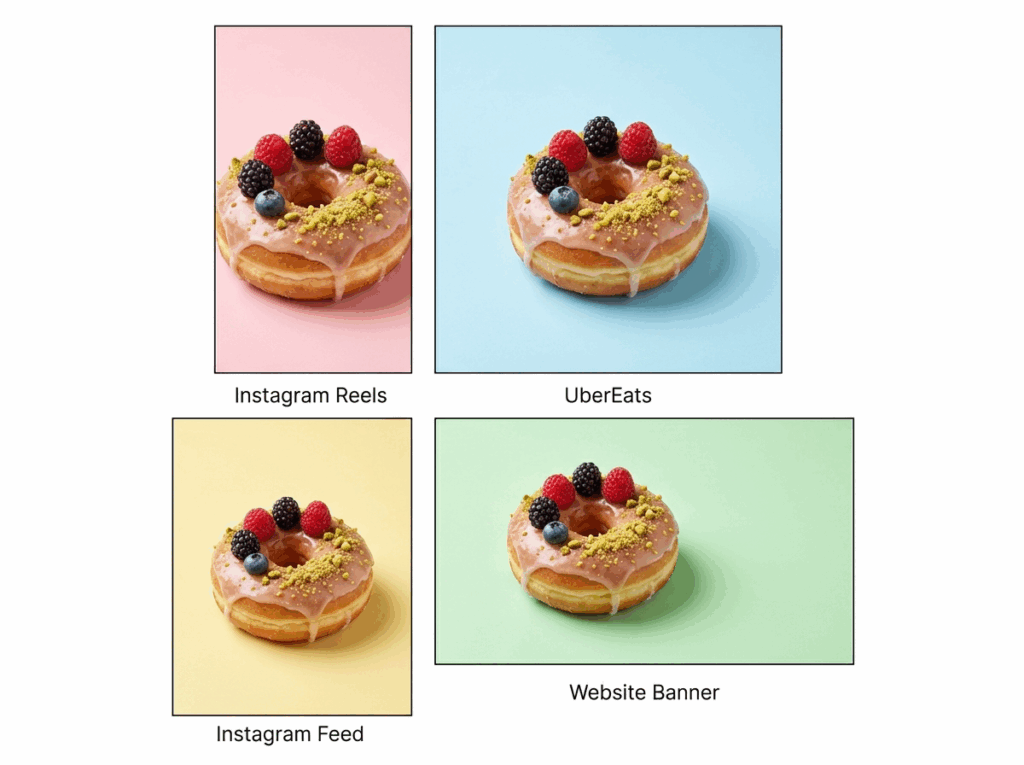
- Set the Ratio: Choose the exact dimensions you need, whether it is a 9:16 vertical crop for an Instagram Reel or a 16:9 horizontal layout for your website banner.
Step 3: Click Generate and Download
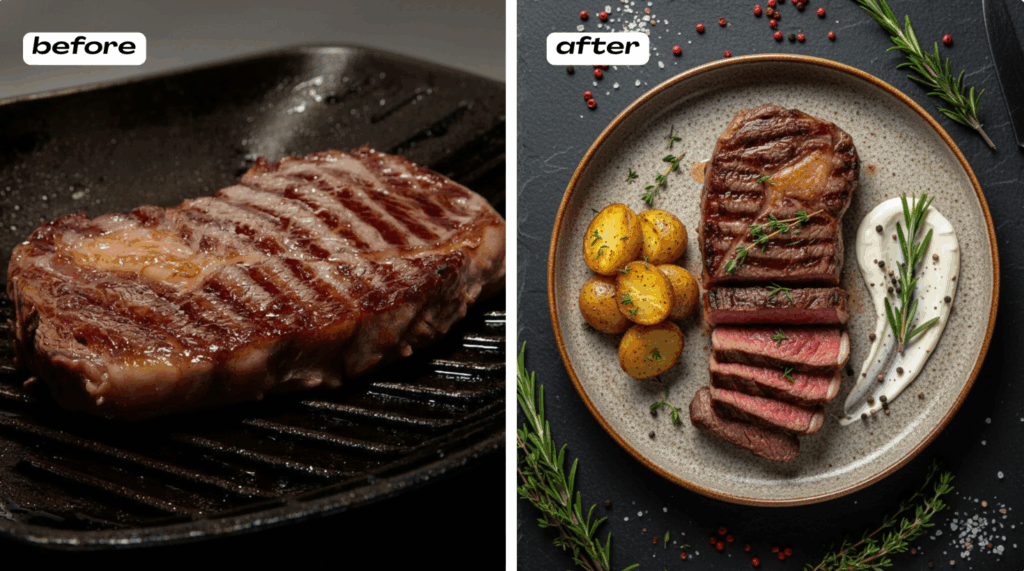
Once you have selected your preferences, simply hit the Generate button. Within seconds, the AI completely isolates your food, enhances its vibrance to make it look fresh out of the oven, and rebuilds the lighting and background from scratch. The result is a hyper-realistic, mouth-watering image ready to be downloaded and shared with the world.
Frequently Asked Questions (FAQ)
To help you fully master the art of culinary photography, we have compiled answers to the most common questions creators and restaurant owners ask when trying to improve their digital menus and social media feeds.
How do I need the latest smartphone model to capture professional food pictures?
Absolutely not. Learning how to take better food photos relies much more on the fundamental rules of lighting and composition than on having the newest lens. A five-year-old phone shooting in great window light will always outperform the newest flagship device shooting in a dark, fluorescent-lit kitchen. Furthermore, when you use a modern AI food photo generator, the software completely rebuilds the image resolution, textures, and depth of field. It bridges the hardware gap entirely, proving that expensive gear is no longer a requirement.
What is the best smartphone camera setting for food photography?
If you are searching for how to take better food photos using just your phone, start by locking your focus. Always tap your screen to lock the focus on the main subject of your dish. This ensures the food remains sharp. Additionally, slightly lower the exposure slider after locking focus. Smartphones tend to overexpose images, making food look washed out. Lowering the exposure slightly preserves the rich colors and deep textures of the meal, giving it a high-end commercial feel.
How do I get rid of harsh shadows without buying professional studio lights?
Understanding light management is a huge part of how to take better food photos. You can use a DIY bounce card. Simply purchase a cheap piece of white foam board from a craft store. Place it on the dark side of your dish, directly opposite your window light. The white board will catch the incoming window light and bounce it back into the shadows, softening them beautifully. Alternatively, you can use our recommended AI generator to automatically remove harsh shadows and replace them with soft, diffused studio lighting in seconds.
Can AI really replace a professional food stylist?
While human art directors are incredible for massive commercial video shoots, an AI generator acts as your digital food stylist for everyday content creation. It solves the biggest mystery of how to take better food photos: how to make the background look perfect. It saves you hours of sourcing props, buying expensive backdrops, and cleaning up messy kitchens. By allowing you to instantly swap backgrounds to a "Warm Restaurant Ambience" or a "Dark Moody Gourmet" setting, it provides professional styling results at a fraction of the cost.
What is the best aspect ratio for my food photos?
It depends entirely on where you are posting. A key tip on how to take better food photos for multiple platforms is to plan your crop early. For Instagram Stories and TikTok, you need a 9:16 vertical ratio. For standard feed posts, a 4:5 ratio is optimal. For food delivery apps, a 1:1 square is usually required. Instead of trying to crop one photo multiple ways, modern AI tools allow you to generate the exact same dish in all these different ratios with a single click, ensuring your composition always looks intentional.
How do you make food look shiny, fresh, and appetizing on camera?
Food loses its shine quickly as it cools down. If you want to know how to take better food photos that look mouth-watering, you must act fast. Traditional stylists use a small brush to paint cooking oil onto meats to keep them looking juicy. However, if you miss that narrow window, you can run your photo through an AI enhancement tool. The algorithm intelligently recognizes textures and reintroduces specular highlights, making the dish look fresh out of the kitchen even if the original shot was taken minutes later.
Is it okay to use filters on my food pictures?
You should avoid heavy, vintage, or color-distorting filters at all costs. An overly warm or deeply desaturated filter can make fresh ingredients look unappetizing. When people ask how to take better food photos, we always recommend sticking to basic adjustments: slightly boost the contrast, increase the sharpness to highlight the texture, and make sure the white balance is neutral. When using AI generation, the styles provided are scientifically calibrated to maintain natural, appetizing food tones while only altering the environment.
Conclusion: Start Elevating Your Visuals Today
Learning how to take better food photos is a continuous journey that combines artistic aesthetics with smart, efficient technology. By understanding the foundational basics of soft natural light, applying the rule of thirds, utilizing complementary colors, and choosing the right camera angle for your specific dish, you are already miles ahead of the competition.
However, to truly dominate crowded social media feeds and boost your restaurant digital sales in 2026, understanding how to take better food photos with new technology is no longer optional; it is essential. Modern AI bridges the massive gap between an amateur smartphone snapshot and a mouth-watering, professional-grade photograph without requiring a massive financial investment.
Stop letting bad lighting and messy kitchens ruin your culinary hard work. If you want to master how to take better food photos today, put these practical tips into action, follow the simple 3-step AI generation process, and watch your everyday meals transform into stunning commercial art. Your audience, and your bottom line, will thank you.