
Changing the background of a photo might sound tricky, especially if you’re new to photo editing. But thanks to online AI tools, it’s actually super easy—even for complete beginners. Imagine you took a selfie at a messy room, or a product photo with a distracting background. With just a few clicks, you can transform it into a clean, polished image. In this guide, you’ll learn how to change background color in AI step by step, so you can get professional-looking results without any prior experience.
The best part? Many AI platforms let you change background free online, which means you don’t need to download complicated software or pay for expensive subscriptions. Whether you’re updating your Instagram profile picture, creating visuals for a blog, or just playing around with creative ideas, AI tools make it quick and fun. Using AI to change background color of photos is not only convenient, but it also helps beginners feel confident trying edits they might have avoided before.
Why Change Background Color Using AI
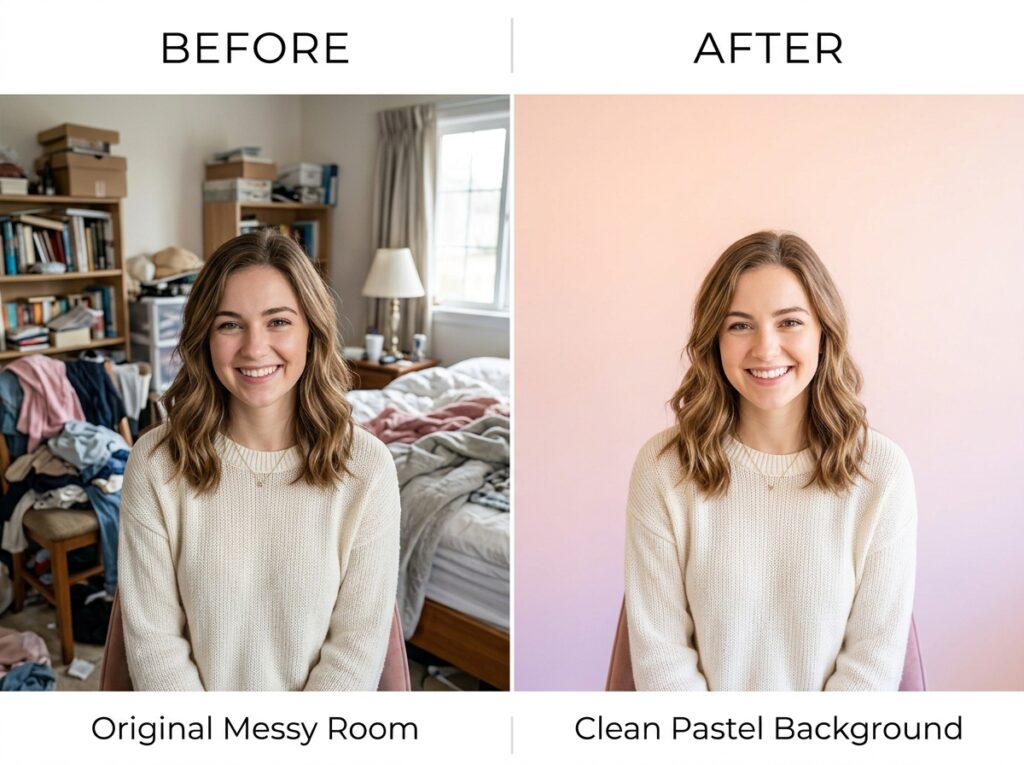
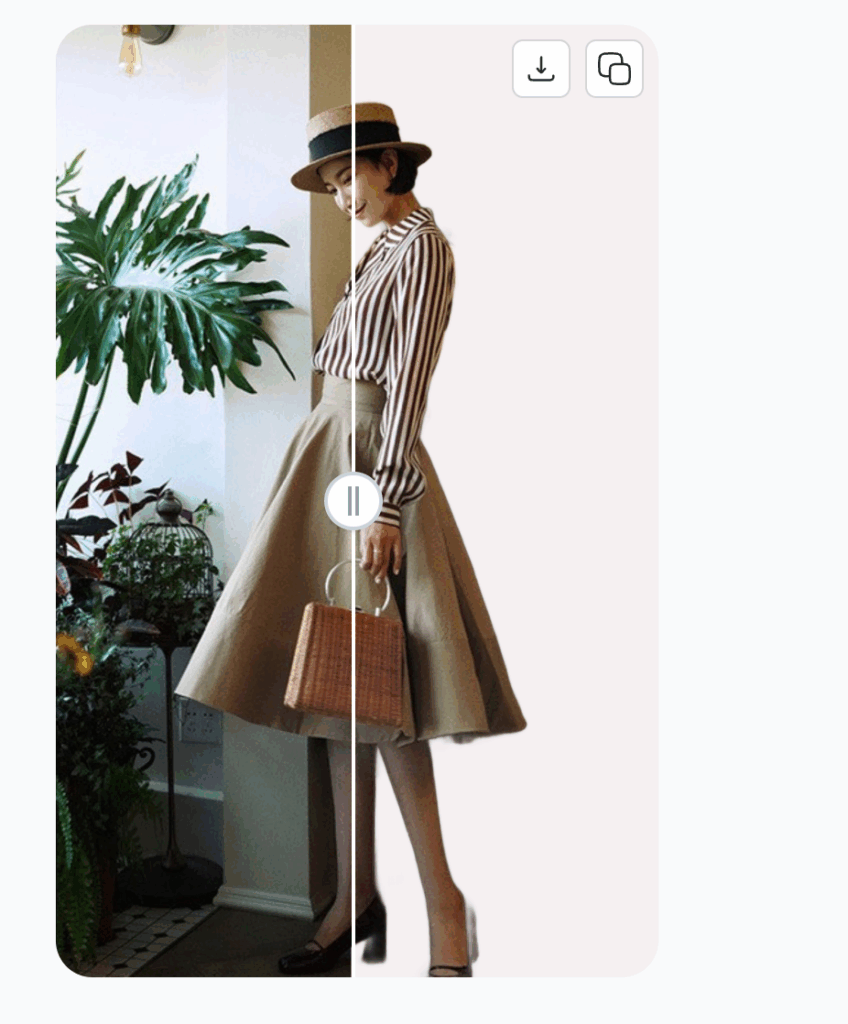
Changing a photo’s background can dramatically improve its look. For example, a simple portrait taken against a cluttered wall can instantly feel more professional if you replace the background with a soft pastel shade. Similarly, a product photo of a coffee mug on a messy table can look clean and market-ready with a plain white background. But doing this manually can be frustrating—selecting edges, erasing details, and trying to match colors can take hours.
AI changes the game by automatically detecting your subject and separating it from the background. This makes it easier to replace colors, add gradients, or even insert a new scene without struggling with complicated layers. Learning how to change background color in AI lets you achieve results that look natural, even for tricky subjects like hair, pets, or semi-transparent objects.
Some of the biggest advantages of AI tools include:
Speed – AI can isolate your subject in seconds, saving hours of manual editing.
Accessibility – You can change background free online from any device, no software installation required.
Precision – Smart edge detection helps you keep details clean, whether you’re working on a person, an object, or a complex scene.
Creativity – You can quickly experiment with different colors, gradients, or textures, making it easy to explore new styles.
For beginners, AI platforms provide instant feedback. You can try a new background, see the results immediately, and tweak colors until it looks perfect. By learning how to change background color in AI, you’re not just editing photos—you’re opening up a world of creative possibilities, all from your browser.
Quick Step-by-Step Guide to Changing Backgrounds
Changing a photo’s background using AI is easier than you might think. Let’s go through each step so even if it’s your first time, you can follow along and see great results.
Upload Your Photo to the AI Tool
The first step is to open an online AI platform, like PhotoGPT, and upload the image you want to edit. Make sure the photo is clear and high-resolution; this helps the AI detect details more accurately.
Example: If you have a photo of a coffee cup on a busy cafe table, upload it and you’ll see how AI automatically separates the cup from the cluttered background.
Tip: Avoid blurry or low-light photos—they can make background replacement less precise. This step is crucial for learning how to change background color in AI efficiently.
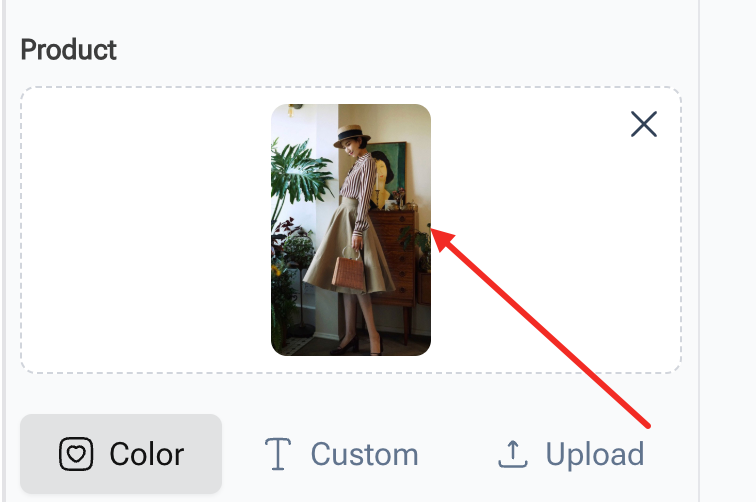
Select the Background Removal or Editing Option
Once your photo is uploaded, choose the AI’s background removal or editing feature. Most AI tools will automatically detect the subject and outline it. Take a moment to review the selection—sometimes you may need to manually adjust small areas.
Example: For a picture of your pet dog on grass, AI might miss a few hair strands at the edges. Simply use the edge adjustment tool to refine the selection.
Tip: Checking edges early saves time later. Getting comfortable with this step is key to mastering how to change background color in AI.
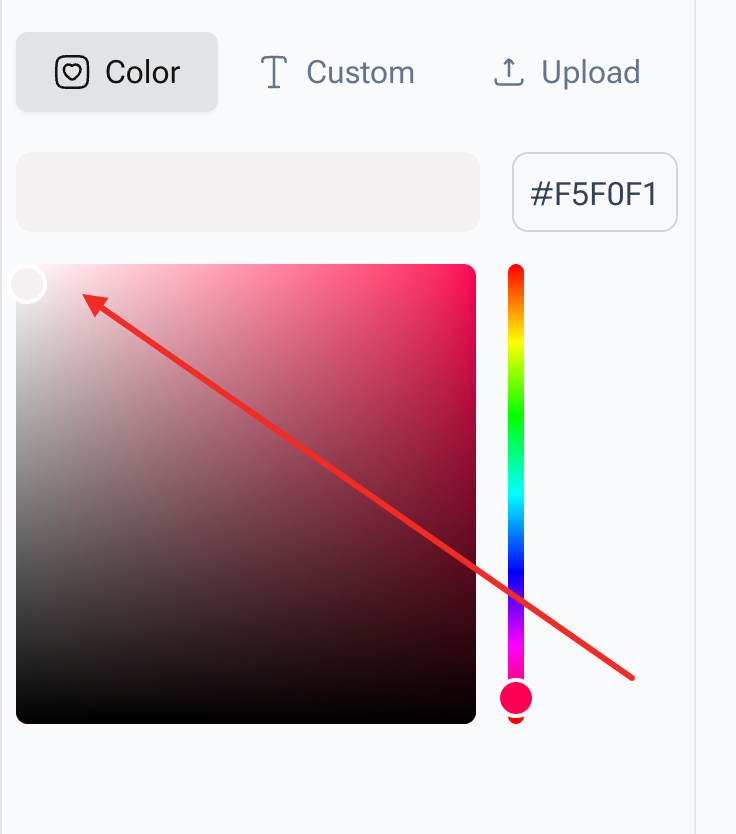
Choose a New Color or Gradient
After removing the original background, pick a new color, gradient, or pattern. Beginners might start with solid colors like white, pastel pink, or light gray. You can also try gradients or subtle textures for more creative effects.
Example: A selfie in a cluttered room can instantly pop when you replace the background with a soft blue gradient. A product photo, like a mug, can look professional against pure white.
Tip: Test different colors to see what complements the subject. This is another moment to practice how to change background color in AI naturally.
Preview Your Image
Before finalizing, preview the edited photo to make sure the new background looks smooth and realistic. Check for any rough edges or areas where the AI may have missed details.
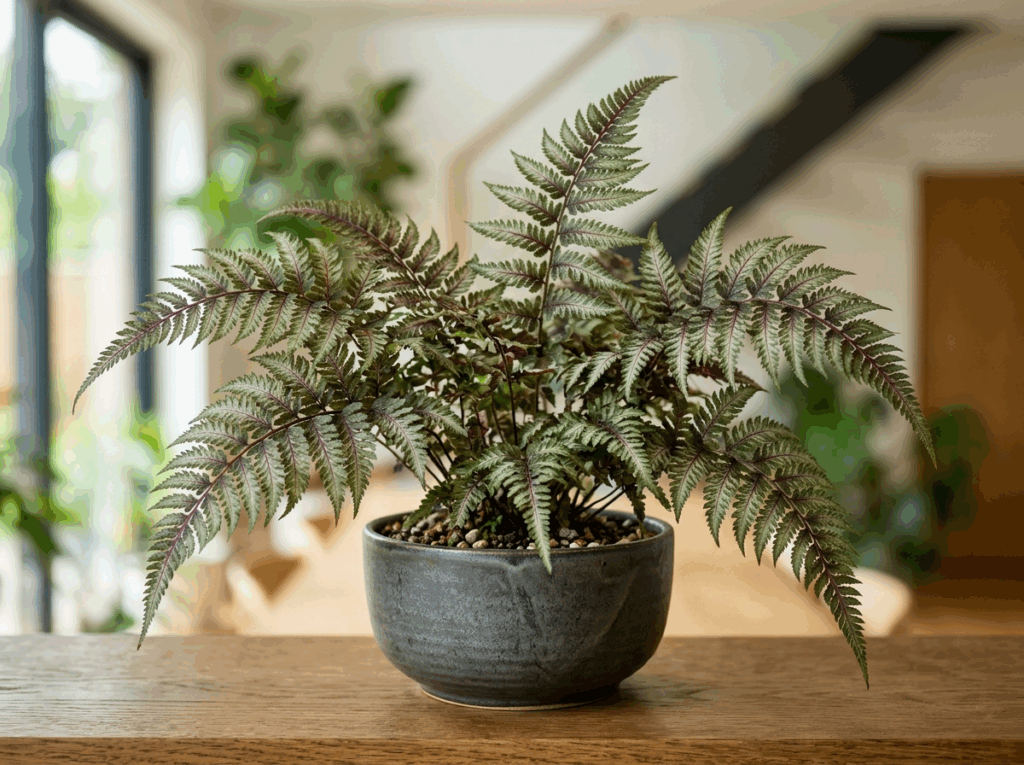
Example: If you’re editing a plant on a table, look closely at the leaves—small gaps can make the background appear uneven. Most AI tools have a zoom-in preview for fine-tuning.
Tip: Previewing early lets you spot issues quickly. It’s an important part of learning how to change background color in AI properly.
Download the Edited Photo
Once you’re happy with your edits, download the photo. Many AI platforms offer options for different resolutions and file types, so choose the one that suits your needs.
Example: If you’re preparing images for an online store, download in high resolution to maintain quality. For social media posts, a medium-resolution JPEG may be enough.

Tip: Save different versions if you’re experimenting with colors. This step completes the process and shows how simple it is to change background free online while mastering how to change background color in AI.
Extra Tricks:
Some AI tools allow you to apply automatic shadow or lighting adjustments to make the new background appear more natural.
Using simple prompts like “replace background with a bright pastel color” can save time and get instant results.
Practice on a variety of images—from selfies to product photos—to understand how AI handles different subjects.
By following these steps, even beginners can quickly see how easy it is to edit photos and explore different looks. After just a few tries, you’ll feel confident in your ability to change background color of photos and create eye-catching visuals effortlessly.
Tips for Better Results
Once you’ve learned how to change background color in AI, there are several tips that can help your edited photos look even more polished and professional. These tips are simple, but they make a big difference, especially for beginners.
Use High-Resolution Photos
The quality of your original photo plays a huge role in the final result. AI works best when it has clear details to detect, so always upload high-resolution images whenever possible.
Example: If you’re editing a product photo for an online store, using a high-resolution image will keep the edges crisp, and the subject will stand out against any background color you choose. Even small details, like the texture of a coffee cup or the strands of hair in a selfie, are better preserved.
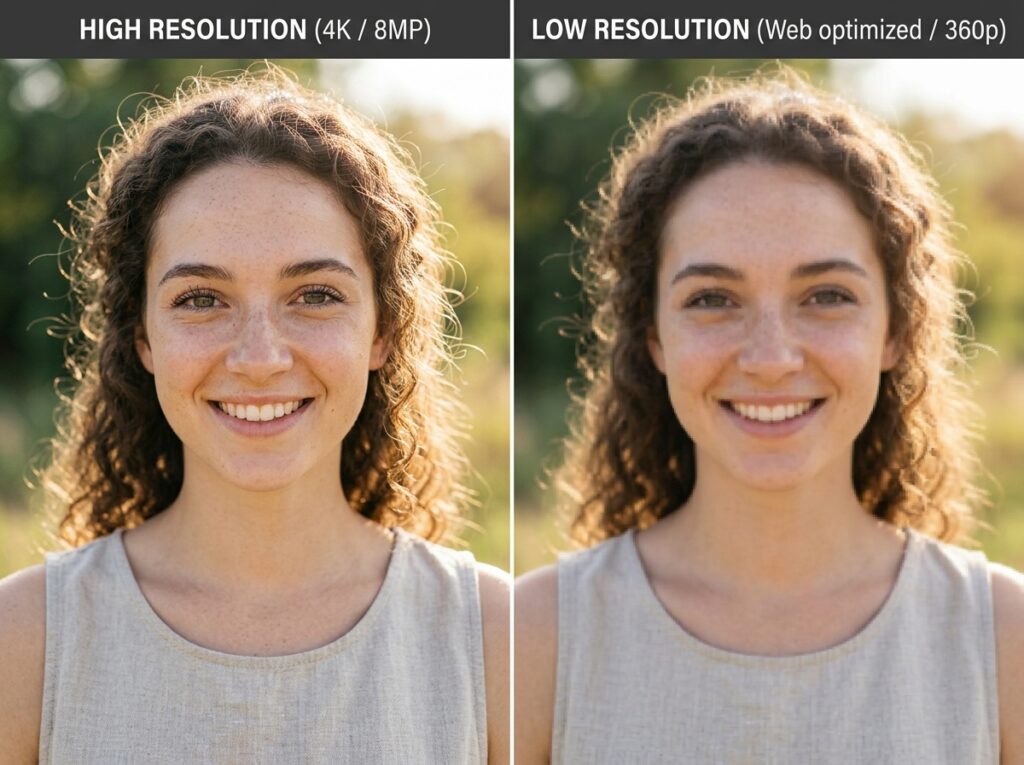
Tip: If your image is blurry or pixelated, AI might struggle to separate the subject from the background, making your edits look less natural.
Match Colors Naturally
Choosing a new background color isn’t just about picking a favorite shade. Consider how it complements your subject. Colors that clash can make the image feel unbalanced or unnatural.
Example: A portrait with warm skin tones often looks best against soft, neutral backgrounds like beige or pastel peach. For a plant in a pot, a light green or cream background can make the colors pop naturally.

Tip: If you’re unsure, start with neutral colors, then experiment with gradients or subtle textures. This is one of the key secrets to mastering how to change background color in AI that looks professional.
Optimize Edges for Complex Backgrounds
Photos with fine details, like hair, fur, or transparent objects, can sometimes look awkward when the background changes. Many AI tools offer edge refinement or smart masking features to smooth transitions.
Example: Editing a picture of a dog with fluffy fur on a busy lawn? Use the AI edge tool to ensure no stray background pixels remain. For transparent objects like glass, check that the color change doesn’t create unwanted reflections.
Tip: Take your time with edge adjustments. A few extra seconds refining the edges can dramatically improve the final result. Practicing this helps beginners see how simple it is to change background color of photos convincingly.
Extra Design Tip:
Use gradients or textures sparingly. Subtle changes can make an image look professional, while overcomplicated backgrounds might distract from the main subject.
Experiment with complementary color palettes to enhance the visual appeal. For instance, soft blue backgrounds can make warm-colored objects pop, creating a balanced look.
Preview your edits on different devices to ensure colors look natural across screens.
By following these tips, you’ll notice a huge improvement in your results. With practice, you’ll not only learn how to change background color in AI effectively but also develop an eye for colors and composition that makes every photo stand out.
Advanced Options for Custom Backgrounds
Once you’ve mastered the basics of how to change background color in AI, you can explore more advanced options to make your photos look truly professional. Online AI tools offer several features beyond simple color replacement, allowing you to fine-tune details, apply textures or gradients, and even use AI prompts to automatically generate creative backgrounds.
Apply Gradient or Textured Backgrounds
Instead of a solid color, you can experiment with gradients or subtle textures to add depth and interest. Gradients can create a sense of dimension, while textures can make the background feel more natural or stylized.
Example: If you have a product photo of a handmade mug, replacing the background with a gentle pastel gradient can make it look modern and eye-catching. A subtle textured background, like a paper or canvas effect, can add character to a portrait without overpowering the subject.
Tip: Start with subtle gradients or textures to avoid distracting from the main subject. By exploring these options, you can see why learning how to change background color in AI opens up creative possibilities.

Adjust Light and Shadow for Realism
Advanced AI tools allow you to adjust lighting and shadows to match your subject, making the new background feel natural. This is particularly useful when the original photo has complex lighting or highlights.
Example: A photo of a dog sitting on a patio might look odd against a flat-colored background. Using AI’s light adjustment features, you can replicate soft shadows, so the dog appears naturally grounded.
Tip: Always preview edits in different lighting conditions. Correct shadows and highlights help your edits look seamless, and practicing this improves your skill at how to change background color in AI.
Fine-Tune Edges and Subject Details
AI tools also let you refine edges automatically or through simple prompts. This is ideal for tricky subjects like hair, fur, or transparent objects. Some platforms allow you to type prompts such as “replace background with light pastel pink” and automatically apply the change while preserving details.
Example: For a photo of a glass vase, using AI edge refinement ensures no harsh lines appear, making the new background blend smoothly.
Tip: Experiment with different prompts to see how AI interprets your instructions. Combining edge refinement with smart prompts is a powerful way to enhance your understanding of how to change background color in AI.
Extra Tricks:
Duplicate your edited image and try multiple backgrounds to compare results.
Use complementary color palettes for portraits or product shots to enhance visual appeal.
For social media, consider vertical or square crops to make images more platform-friendly after editing.
By taking advantage of these advanced features, you can go beyond simple background swaps. AI makes it easy to create professional, visually appealing images, even if you’re just starting. Mastering these tools allows anyone to confidently change background free online and explore endless creative possibilities.
Conclusion
Editing photos is easier than ever with AI tools. By following this guide, you now know how to change background color in AI quickly and easily, even as a beginner.
Whether it’s a selfie, product photo, or creative project, online AI platforms let you change background color of photosin just a few clicks. You can experiment with solid colors, gradients, or textures, and AI’s smart features help refine edges automatically.
The best part? You can change background free online, so there’s no need for expensive software or complicated tools. Start experimenting, try different backgrounds, and see how simple it is to transform your images into professional-looking visuals.
With a little practice, mastering how to change background color in AI will be effortless, letting you create eye-catching photos for social media, blogs, or personal projects.