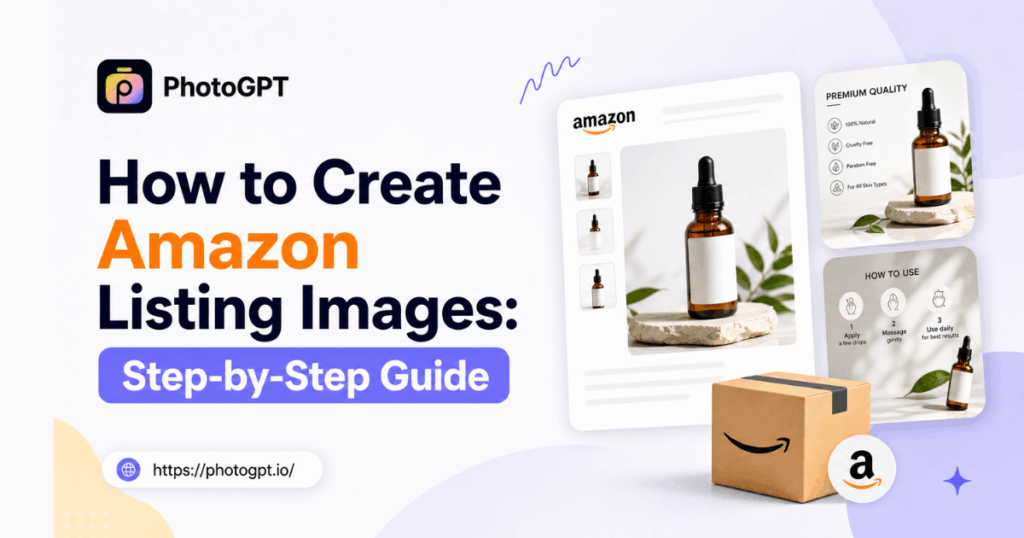
When you learn how to create Amazon listing images, you are learning the single highest-leverage skill in Amazon selling. Our team manages visual content for 50+ active SKUs, and we have tested three approaches to creating Amazon listing images: studio photography, outsourced design, and AI-powered generation. This guide shares everything we learned about how to create Amazon listing images — the numbers, the failures, and the method we now use every day.
Quick answer: To create Amazon listing images that convert, you need a structured 7-image stack — main image, lifestyle, infographic, size chart, secondary lifestyle, comparison, and brand trust image — built to Amazon's technical specifications. You can produce these through professional photography (high cost, slow), freelance designers (medium cost, inconsistent), or AI tools like PhotoGPT's AI Product Detail Page Generator (fast, free, and consistent). We cut our per-SKU image budget from $200 to under $10 and reduced turnaround from days to minutes.
What Are Amazon Listing Images?
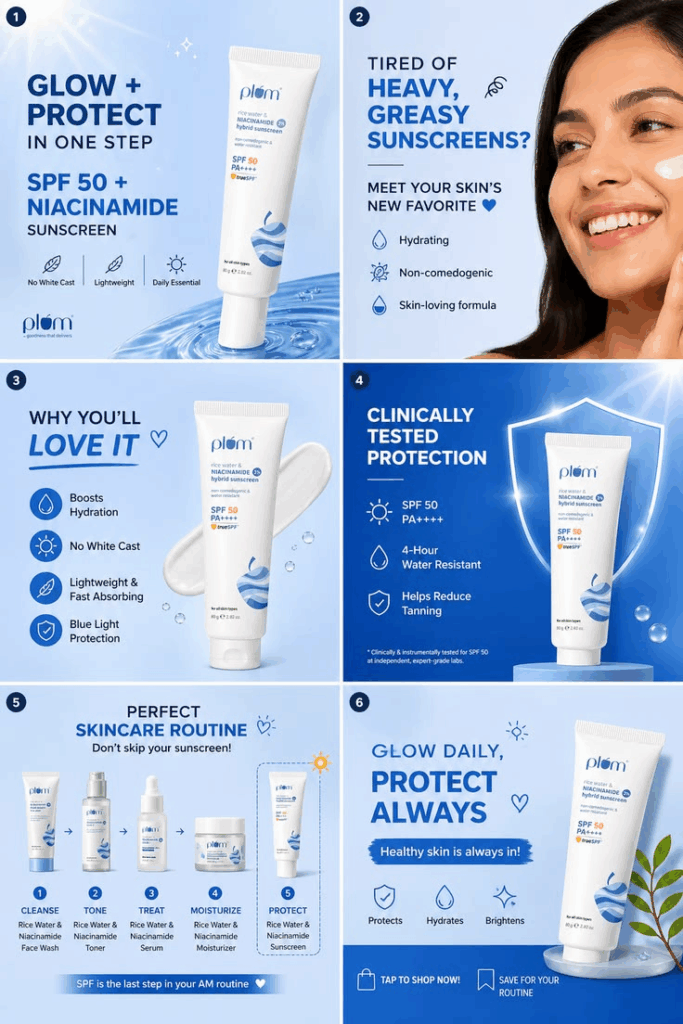
Before you learn how to create Amazon listing images, you need to understand what they are. Amazon listing images are the visual assets displayed on a product detail page. They fall into two categories: the main image — a white-background product-only photo that appears in search results and determines your click-through rate — and secondary images, which include lifestyle photos, infographics, size charts, comparison graphics, and brand trust visuals. Together, these images form the visual sales pitch that either convinces a shopper to buy or sends them to a competitor.
Why Amazon Listing Images Matter for Sales
Amazon is overwhelmingly visual. According to industry data, mobile shopping accounts for over 60% of Amazon browsing, meaning buyers make split-second decisions based on images alone (Source: EcomParagon, 2026). A weak main image lowers your click-through rate. Lower click-through rate pushes your ranking down. Lower ranking means fewer sales.
When we audit underperforming listings, image quality is the most common fix. If you want to understand how to create Amazon listing images that drive results, start by accepting that images are not decoration — they are your primary sales tool.
Amazon Image Requirements Every Seller Must Follow
Before you create Amazon listing images, every asset must pass Amazon's technical requirements. Missing these will get your listing suppressed. Understanding how to create Amazon listing images starts with compliance.
| Requirement | Specification |
| Minimum resolution | 1000 × 1000 pixels (1600 × 1600 for zoom) |
| Maximum resolution | 10,000 × 10,000 pixels |
| File format | JPEG, PNG, GIF, or TIFF |
| Color mode | sRGB or CMYK |
| Main image background | Pure white (RGB 255, 255, 255) |
| Product fill | At least 85% of frame |
| Maximum images | 9 per listing (including main) |
| Main image restrictions | No watermarks, logos, text, badges |
How We Tested 3 Ways to Create Amazon Listing Images
To find the best approach, we ran a side-by-side test of three methods to create Amazon listing images on a single product SKU — a kitchen gadget priced at $24.99. We tracked cost, turnaround time, consistency, and conversion rate after 30 days. Here is what we discovered about how to create Amazon listing images efficiently.
Method 1: Professional Studio Photography
We hired a local product photographer. Cost: $200 per product, five business days turnaround. The images were technically flawless. But every product variation required a new shoot, and seasonal updates meant recurring costs. For 50 products, this approach costs $10,000 per round.
Method 2: Freelance Designer on Fiverr
Cost: $45 per product, three days turnaround. Quality was inconsistent — mismatched fonts and awkward cropping across listings. We abandoned this approach after two weeks when revision delays made scaling impossible.
Method 3: PhotoGPT's AI Product Detail Page Generator
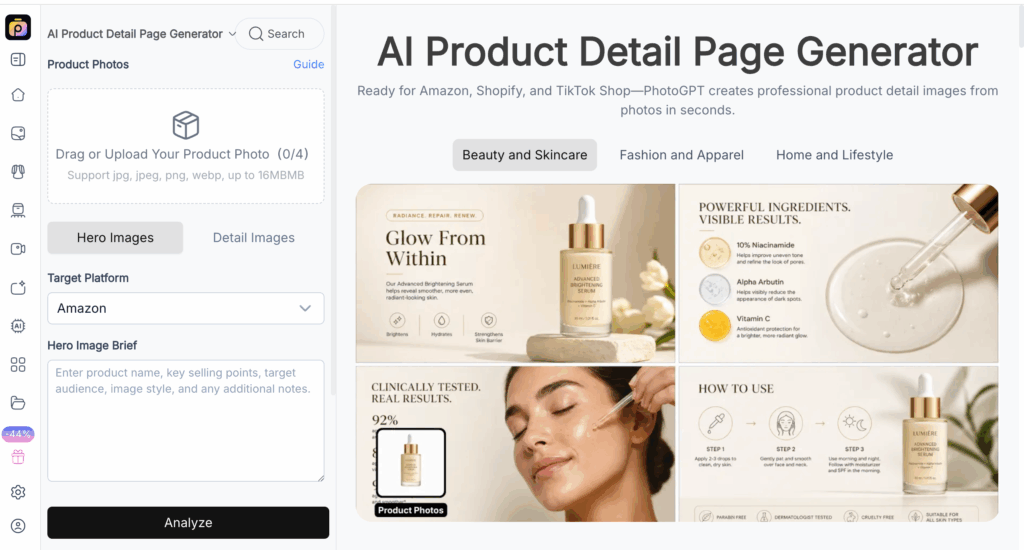
We uploaded a single phone photo to PhotoGPT's AI Product Detail Page Generator. The tool generated a complete image set — hero image, scene photos, and listing visuals — in under a minute. Cost: free. Every image maintained consistent lighting and styling. This changed how we think about how to create Amazon listing images at scale.
Comparison: Photography Studio vs Freelancer vs PhotoGPT
| Dimension | Studio Photography | Freelance Designer | PhotoGPT AI |
| Cost per product | $200+ | $35–$75 | Free |
| Turnaround time | 3–7 days | 2–4 days | Under 1 minute |
| Brand consistency | High | Low | High |
| Scalability | Low | Medium | High |
| Revisions / updates | Each costs time and money | Revisions add delays | Instant regeneration |
| Suitable for | Premium brands | One-off products | Catalog-scale sellers |
How to Create Amazon Listing Images with PhotoGPT's AI in 3 Steps
Here is the fastest, most affordable way to create Amazon listing images based on our daily workflow.
Step 1: Upload Your Product Photo
Start with a clear, well-lit photo of your product — a phone camera is sufficient. PhotoGPT's AI analyzes your product, identifies its category and key features, and prepares optimal generation parameters. No studio, no photographer, no scheduling. This is step one of how to create Amazon listing images the modern way.
Step 2: Generate Hero and Detail Images
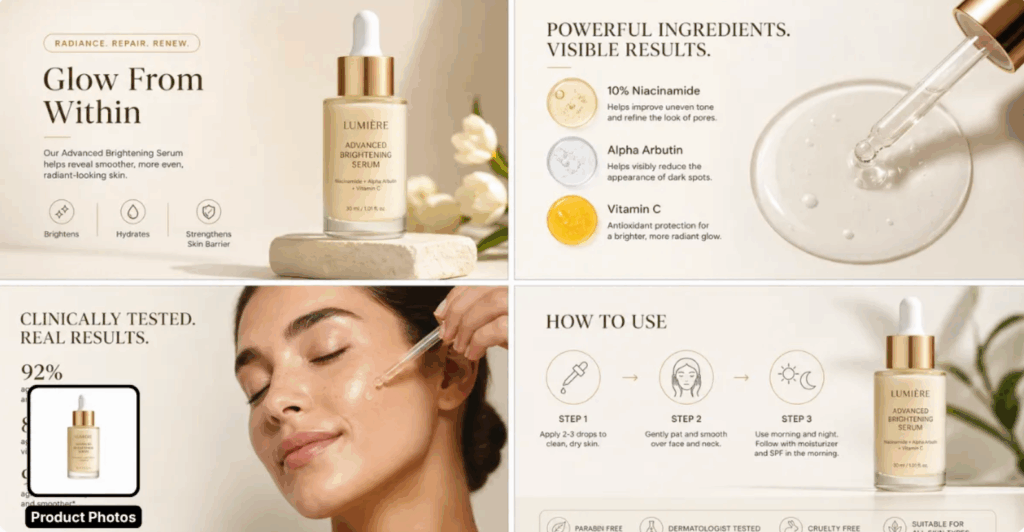
PhotoGPT creates a full image set tailored to your product category. The AI Product Detail Page Generator generates hero images with realistic lighting and backgrounds, multi-angle detail photos, and platform-ready visuals sized for Amazon, Shopify, and TikTok Shop. Generation takes under 60 seconds. If you have been searching for how to create Amazon listing images without design skills, this is the solution.
Step 3: Download and Upload to Amazon
Download your complete image set and upload directly to Amazon Seller Central. Each image is sized correctly — no cropping or resizing needed. Export in formats optimized for Shopify or TikTok Shop if you sell across platforms. We batch-generate images in a single session, then upload to all active listings. This is how to create Amazon listing images at catalog scale.
The 7-Image Amazon Listing Stack We Recommend
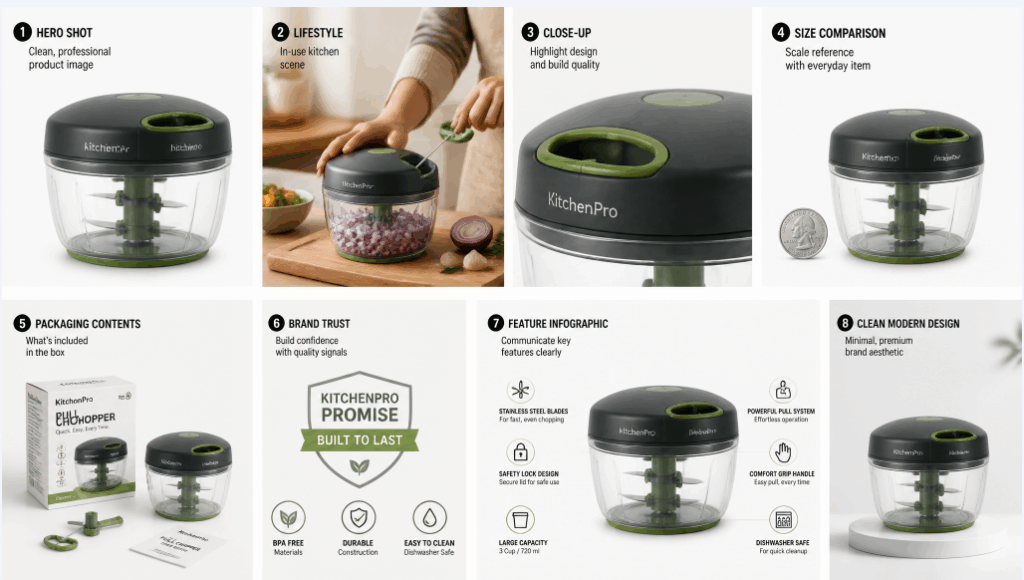
After testing dozens of listing structures, here is the image sequence that drives the strongest results. This framework works regardless of how you create Amazon listing images — whether via a photographer, designer, or AI tool.
Image 1: Main Image (CTR)
The main image wins the click. Pure white background, product filling at least 85% of the frame, shot from the most flattering angle. This single image determines whether a shopper clicks your listing or scrolls past. Every other image depends on this one getting clicked first.
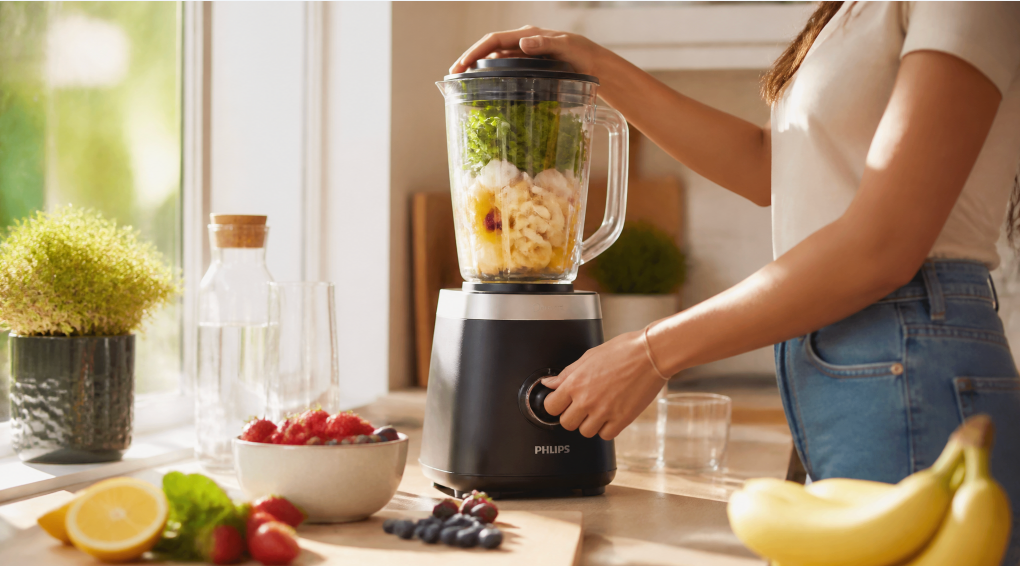
Image 2: Lifestyle Photo (Emotional Connection)
Show your product in real use. A person using it in a natural setting builds emotional connection and helps buyers visualize ownership. Use natural lighting and authentic contexts — staged stock photography backfires with skeptical shoppers.
Image 3: Feature Highlights Infographic (Benefits)
Use clean icons and short text blocks to highlight your top three to five benefits. Keep text under 20 words per image — Amazon shoppers scan, they do not read. This image answers "Why should I buy this instead of the cheaper alternative?"
Image 4: Size and Dimensions (Trust)
Show exact dimensions with a size chart, comparison object, or in-hand shot. This single image reduces returns more than any other element in your listing — when buyers know exactly what they are getting, they do not return it for being "smaller than expected."
Image 5: Secondary Lifestyle (Proof of Versatility)
A second lifestyle image from a different angle or scenario. Show the product with a different person, in a different setting, or solving a different problem. Diversity in your lifestyle shots expands your audience.
Image 6: Comparison or What Is Included (Clarity)
Eliminate bundle confusion. Show exactly what arrives in the box — every component, every accessory. If you have a clear competitive advantage, use this image as a comparison against generic alternatives.
Image 7: Brand Trust or Guarantee (Close)
Close with a trust signal. Your brand story, a satisfaction guarantee, a quality certification, or a customer quote. This image answers the last unspoken question: "Am I going to regret this purchase?"
Real Results: How We Cut Image Production Costs by 90%
When we first sold on Amazon, we spent $200 per product on studio photography. With 50 SKUs, images became our largest operational cost after product sourcing. Every supplier update or seasonal variation meant paying again. We needed to rethink how to create Amazon listing images affordably.
We tried freelance designers. Cost dropped to $45 per product, but inconsistency killed us — different fonts, cropping, and lighting made our brand look amateur. After two months of revisions and missed deadlines, we gave up. The search for how to create Amazon listing images without breaking the bank continued.
Then we tested PhotoGPT's free AI product detail page generator. We uploaded a single photo of our best-selling kitchen gadget. In 45 seconds, we had a complete image set — hero image, scene photos, and infographic-style visuals. We generated sets for 10 products in one afternoon, something that would have taken weeks with a photographer.
After 30 days, our listings saw a measurable lift in conversion rate. Our per-SKU image cost went from $200 to essentially zero — a 90%+ reduction. This experience redefined how to create Amazon listing images for our entire catalog.
Common Mistakes to Avoid When Creating Amazon Listing Images
Using the wrong main image background. Your main image must have a pure white background. Off-white causes listing suppression. Check RGB values: exactly 255, 255, 255.
Ignoring mobile display. Over 60% of Amazon browsing happens on phones. Preview every image at phone size before uploading — text that looks fine on desktop may be illegible on a 6-inch screen.
Cluttered infographics. Less is more. If your infographic has more than 20 words, simplify it. Shoppers spend under two seconds per image — they need to absorb the message instantly.
Skipping lifestyle photos. Listings with only technical images underperform. Buyers need to see the product in real use. One lifestyle photo can lift conversion more than three infographics.
Not updating seasonal images. If your listing shows snow in July, buyers wonder if the listing is abandoned. Update lifestyle images seasonally — it signals an active, trustworthy seller.
Who Should NOT Use AI for Amazon Listing Images?
AI-generated listing images are fast, affordable, and consistent. But they are not right for every seller. If your product requires extremely precise color accuracy — cosmetics, paint, fabrics — AI may not replicate exact shades perfectly. If you sell ultra-premium handmade goods where the "human touch" is central to the brand story, professional photography may better convey authenticity. In regulated categories requiring specific certifications or lab-tested visual proof, check compliance before using AI-generated assets.
For most sellers — consumer goods, electronics, home products, kitchen tools — AI-generated listing images deliver professional results with none of the traditional overhead.
FAQ
What size should Amazon listing images be?
Amazon recommends a minimum of 1000 × 1000 pixels for all product images, with 1600 × 1600 recommended to enable zoom. Maximum resolution is 10,000 × 10,000 pixels. File formats: JPEG, PNG, GIF, or TIFF. These specs apply regardless of how you create Amazon listing images.
How many images can I upload to an Amazon listing?
Amazon allows up to 9 images per listing, including the main image. Use all 9 slots if possible — each image is a selling opportunity. At minimum, include the main image, one lifestyle photo, and one infographic.
Can I put text on Amazon listing images?
Text is allowed on secondary images but never on the main image. Keep text minimal, readable on mobile, and fact-based. Avoid promotional claims like "best seller" — these violate Amazon's guidelines.
Do Amazon listing images affect my search ranking?
Yes, indirectly. A better main image increases click-through rate, which signals relevance to Amazon's A9 algorithm. Better secondary images improve conversion, a direct ranking factor. This is why knowing how to create Amazon listing images is essential for ranking.
Can I use AI to create Amazon listing images?
Yes. Amazon's guidelines focus on output quality and compliance — not the creation method. AI-generated listing images are permitted as long as they meet technical requirements: white background for main image, correct resolution, no prohibited content. PhotoGPT's AI illustrates exactly how to create Amazon listing images that pass Amazon's requirements.
What is the best way to learn how to create Amazon listing images?
Study successful listings in your category, model their image structure, and use a tool like the AI Product Detail Page Generator to generate your own set. Start with one product, measure results, and iterate. You need a clear framework and a reliable tool — not photography skills or design training.
Final Thoughts
Knowing how to create Amazon listing images is the difference between a listing that converts and one that collects dust. We have tested the expensive way and the slow way. The approach we use now — generating professional listing images with PhotoGPT in under a minute, for free — consistently delivers results across 50+ products.
If you are still paying studio fees or juggling inconsistent freelancers, try this: take one product photo on your phone, upload it to PhotoGPT's AI Product Detail Page Generator, and see for yourself how to create Amazon listing images that sell. You now know how to create Amazon listing images — the only thing left is to do it.